


 6 Layers of Protection


We’re excited to announce a new beta version of Imunify360 that adds a lot of new features and improvements, and fixes some bugs as well. Here’s a list of new features in version 4.4:
- Imunify PAM module
We’ve introduced an effective way to prevent brute-force attacks against FTP/SSH. It considers both the username and IP address used in an attack, so it’s possible to distinguish between legitimate user logins and brute-force attacks against the account. It works in a more effective way with fewer false positives. It is enabled in the GUI via Settings->General->PAM.
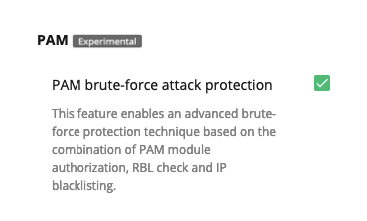
It can also be enabled via the CLI with the following command:
imunify360-agent config update '{"PAM": {"enabled": true}}'
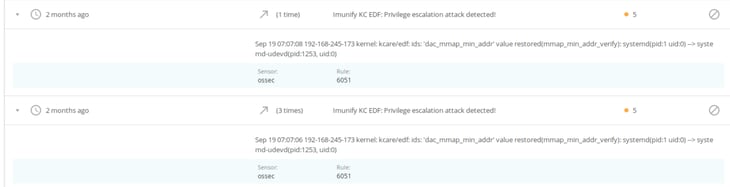
- EDF (Exploit Detection Framework) Plugin: root privilege escalation detector
This is how you activate it:
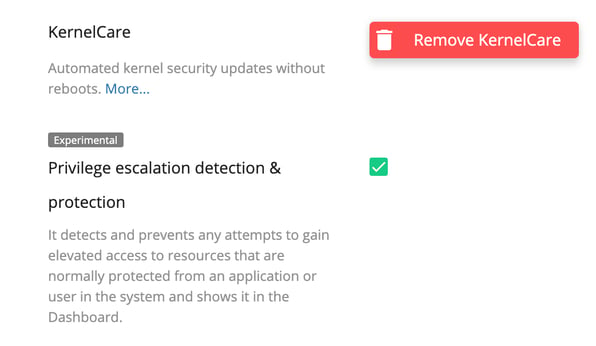
It can also be enabled via the CLI with the following command:
imunify360-agent config update '{"KERNELCARE": {"edf": true}}'
- ELF files detection in user folders
Malicious binary executables (ELF files) are often placed within user home directories. So, there is a new option that also scans these directories for malware. To prevent too many false positives, it’s disabled in version 4.4 by default.
As this is an experimental feature, please share your experiences of it via feedback@imunify360.com, so we can improve it in future versions.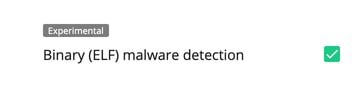
- CDN Support for new installations by default
In previous versions, CDN support was considered experimental. It is now proven, so we have enabled it by default for all new installations. It lets Imunify360 manage traffic coming through, and detects attackers behind CDNs and proxies.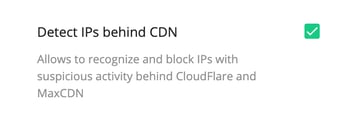
For existing installations, you can turn it on in the UI with:
Settings->General->WebShield
or via the CLI:
imunify360-agent config update '{"WEBSHIELD": {"known_proxies_support": true}}'
- DOS plugin for new installations by default
In previous versions, the DOS plugin was also considered experimental, but it too has proved its worth so now it’s time to enable it by default for all new installations.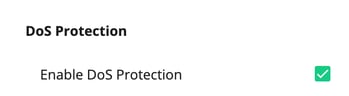
For existing installations, you can turn it on in the UI using:
Settings->General->DoS Protection
It can be enabled via the CLI with:
imunify360-agent config update '{"DOS": {"enabled": true}}'
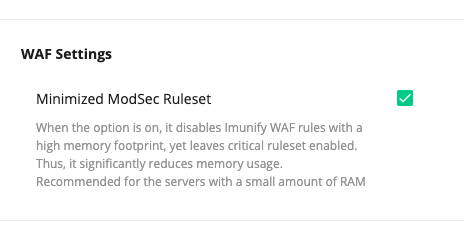
- Support for low RAM (<2Gb) VPS
We’ve implemented a series of improvements to make Imunify360 perform better on low-RAM VPS servers. We call it “Low Resource Usage” mode. It is enabled by default for the installations with low RAM.
In the “Low Resource Usage” mode, Imunify360 disables WebShield component (and GreyListing as a dependent) and switches to the minimized ModSec ruleset to dramatically reduce RAM usage, yet stay defensive and effective.
You can easily switch back to the normal mode just by enabling WebShield or unchecking “Minimized ModSec Ruleset” in Settings.
- Domain reputation management in ImunifyAV
ImunifyAV now has the same domain reputation features already enjoyed by Imunify360 customers.
- Improvements for RBL (Real-time Blackhole List)
Imunify360 can block almost all brute-force server attacks within 2 minutes of them starting.
- Consistent Malware Scanner reports
Under some conditions, the results of scans were not consistent in the UI (the number of detected threats might vary). This has been fixed.
- Improved Imunify360 Plesk installer
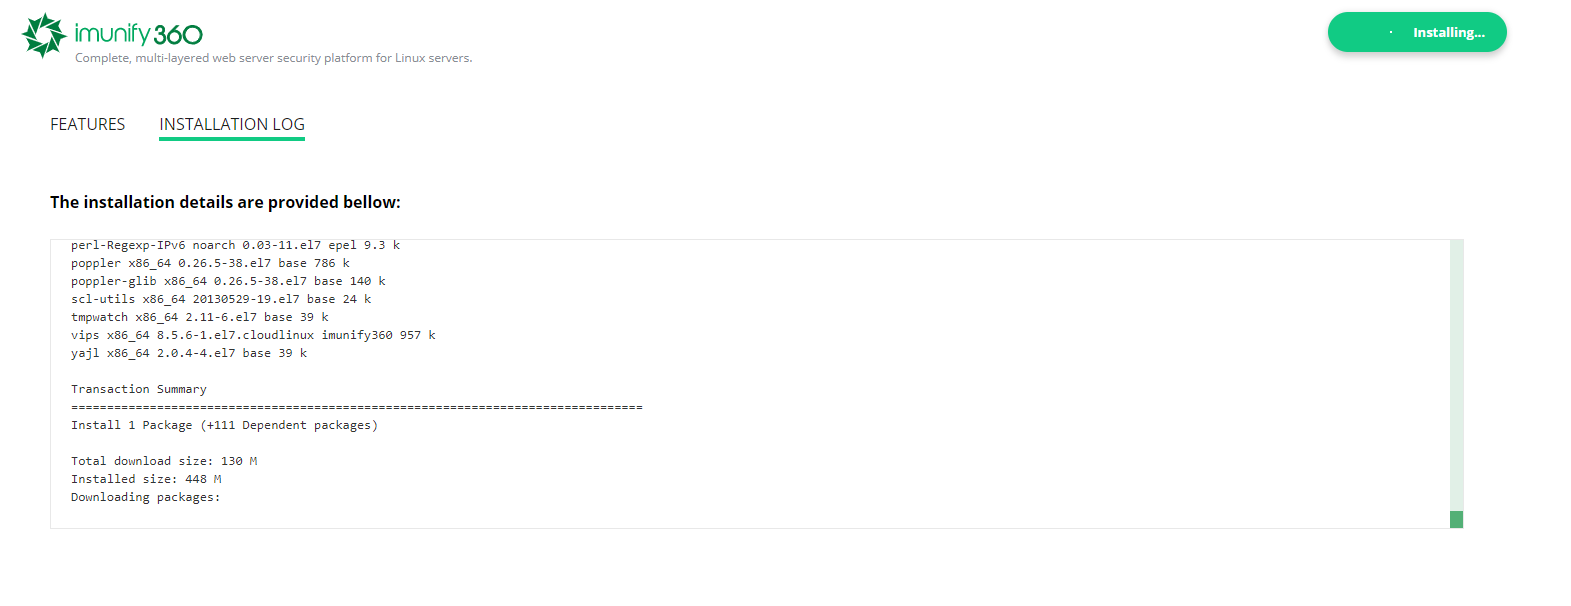
The installation process of Imunify360 for Plesk became more visible and informative:
It has got a log window:

- Other notable changes
- Added support for Modsec + Nginx on DirectAdmin panel
- Improved performance of real-time malware scan
- Added support of Ubuntu 16/18 in ImunifyAV
- Improved overall performance and stability of Imunify360 and ImunifyAV
If you have any comments and suggestions regarding the release, or any feature requests, you can reach out to the product team via feedback@imunify360.com.
And, don’t forget the support team, who are always happy to help with any issues or questions on product installation and usage. To contact them, submit a ticket via ZenDesk.
How to install
To install the new Imunify360 version 4.4 beta, please follow the instructions in the documentation.
How to upgrade
To upgrade Imunify360 on CentOS/CloudLinux systems, run the command:yum update imunify360-firewall --enablerepo=imunify360-testing
To upgrade Imunify360 on Ubuntu 16.04, run the command:echo 'deb https://repo.imunify360.cloudlinux.com/imunify360/ubuntu-testing/16.04/ xenial main' > /etc/apt/sources.list.d/imunify360-testing.list
apt-get update
apt-get install --only-upgrade imunify360-firewall
To upgrade Imunify360 on Ubuntu 18.04, run the command:echo 'deb https://repo.imunify360.cloudlinux.com/imunify360/ubuntu-testing/18.04/ bionic main' > /etc/apt/sources.list.d/imunify360-testing.list
apt-get update
apt-get install --only-upgrade imunify360-firewall


.png?width=115&height=115&name=pci-dss%20(1).png "pci-dss")