


 6 Layers of Protection


There’s a dangerous new malware affecting Linux and IoT devices known as HiddenWasp. In this article, I’ll dissect it to show you how it works and how you can stop it infecting your Linux server or IoT device.
Introduction
The HiddenWasp malware is not a single malicious script or binary. Rather, it is a set of tools, consisting of a rootkit, a trojan and a few bash scripts, together designed to maintain control over an already compromised system. This malware kit can hook up to different system functions and hide itself from the list of processes, hide its files, and even update itself to new versions.
As with Mirai, HiddenWasp looks as though its aim is to control compromised IoT devices, although it can also infect non-IoT Linux servers as well.
Detection
The malware kit has two execution modes. I’ll call them ‘non-privileged user mode’ and ‘root mode’.
Non-privileged user mode
If the user account that executes the malware scripts does not have root privileges, it will just copy the trojan to

and execute it:
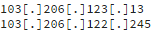
The trojan will then connect to its CNC (Command and Control) servers. When Intezer was checking it about a month ago, the IP addresses (on port 61061) were:
So it is easy to detect on this level by looking for binaries running from the
![]()
directory:

Normally, the output from this command should be empty, as it is bad practice to execute anything from.
![]()
Root mode
It becomes much worse if the compromised user has root privileges. You may already have troubles at this stage because attackers have root access. In most cases, I recommend you migrate user data from the compromised server and reinstall it from scratch (i.e. restore from a backup or some clean image).
The malware kit will try to plant its agents into these locations:
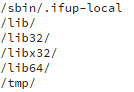
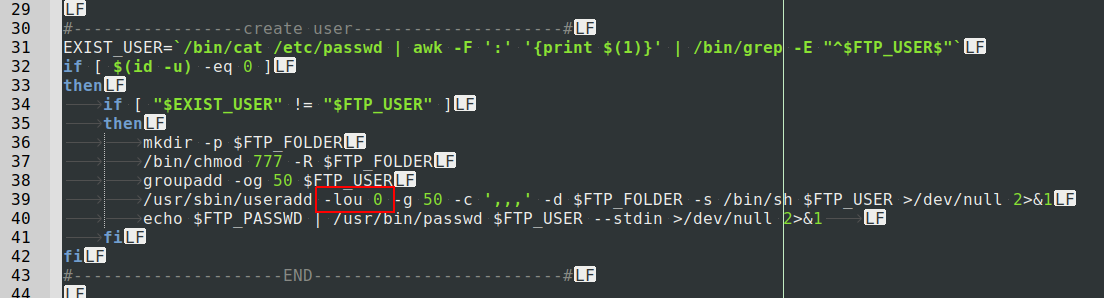
It will also create an
![]()
user with root UID:
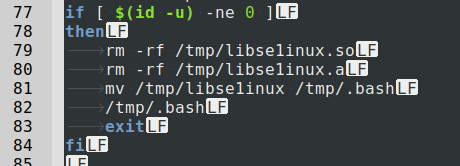
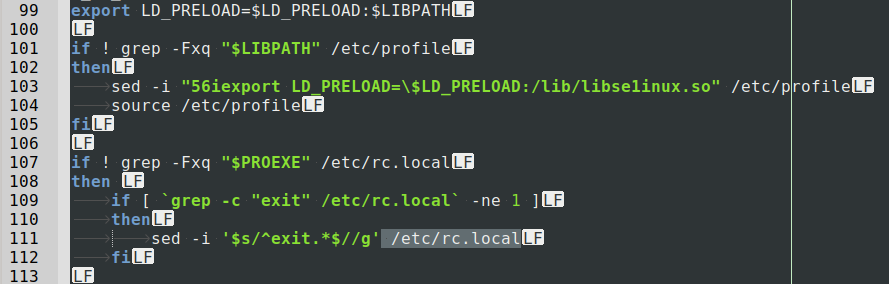
Additionally, it will try to change the

environment variable and the

file to maintain its presence on the system:
After everything is set, the malware executes, connecting to its CNC server, and doing everything possible to hide its own files, processes, and any modifications it made. Because the malware is intent on hiding itself, and the fact the server or device was compromised, it is hard to spot the issue. But here are two commands for Debian- and RedHat-based systems that can help.
The command for Debian-based systems:

The output would be:

The command for Red Hat-based systems:

And its output would be:

These commands find shared libraries that do not belong to any package. Usually, there are no such libraries in the

directory on live systems. Plus, you can see that attackers try to cloak their library name to look like

but where the malware replaces the first letter of ‘linux’ by a numeric one
![]()
). On many terminal fonts the difference might be non-evident. You can add this command to the cron jobs on the server and dump the output to a log file to keep track of any changes in
This will record any sudden appearance and disappearance of libraries not belonging to a package.
You should also check your

file for users with a UID of 0:

The output should be something like:

Normally, there should be only one user (root) with a UID of 0 on your system (unless you have created more yourself). As I showed in figure 2 above (command line options highlighted), malware can create additional users with a UID of 0. However, this way will not always work on compromised systems because system calls might be overridden by malware with the help of the

environment variable.
For such cases you can monitor the network activity, specifically on port 61061. Researchers from Intezer were able to decrypt malware binaries, and found that communication with the CNC server happens on this port. If you see connections on this port, there is a chance your server may be compromised and you should block the port immediately.
Mitigation
If you believe your system is infected and attackers have root access, as mentioned before, it is better to migrate critical data and reinstall the server.
It is impossible to say with 100% confidence that a system has not been compromised—there is always some small possibility of a hack. But if you monitor server network activity, install software and performance monitoring, configure your network firewall (e.g. all unused network ports and routes disallowed), define a complicated password policy, and ensure constant security updates monitoring, and if the steps in the previous chapter have not given you any positive output (you have not found any alien libraries or scripts running), you may consider your server relatively secure, in other words, ”not rooted”.
Sometimes the hack is clearly evident. Attackers, for example, start to load the CPU with crypto mining activity, or encrypt your data storage and ask for bitcoins. But there are cases when you can identify the intrusion only by monitoring many different parameters for anomalies, such as suddenly appearing and disappearing processes, shared libraries, or outgoing and incoming network connections on unusual ports. You must also look out for unexpected software behavior and system slowdowns from time to time.
Remember, such changes in behavior do not always mean a hack has happened, but it is a signal that you should make deeper checks.
A more advanced approach requires system-wide profiling, and the monitoring for abnormal activities that fall outside of the set profiles created for your Linux server throughout its life cycle. If your server was not rooted, then you can just examine all processes started from the
/tmp or /var/tmp directories, and kill them, like this:
lsof |grep /tmpIn fact, we have not yet seen any example of such infection on a non-rooted server. So the chance you will see it in non-root mode is low.
In this article we are talking about manual procedures to mitigate the issue, but there is automated malware protection software (such as our own Imunify360) that does a more effective job.
What you can do to stop HiddenWasp
Block ports
Block these CNC IPs in your firewall:
103[.]206[.]123[.]13
103[.]206[.]122[.]245
On most Linux servers you can use the following commands to do this:
iptables -A OUTPUT -d 103.206.123.13 -j DROP
iptables -A OUTPUT -d 103.206.122.245 -j DROP
iptables -A INPUT -s 103.206.123.13 -j DROP
iptables -A INPUT -s 103.206.122.245 -j DROP
Make the changes persistent
Ubuntu 16.04 and above
On Ubuntu, you must install the iptables-persistent package before you can save changes.
sudo apt-get install iptables-persistent
sudo netfilter-persistent save
Ubuntu older than 16.04
sudo invoke-rc.d iptables-persistent saveCentOS 6 and older
sudo service iptables saveCentOS 7 and later
Use firewall-cmd to update and save iptables rules:
firewall-cmd --permanent --direct --add-rule ipv4 filter OUTPUT 0 -d 103.206.123.13/32 -j DROP
firewall-cmd --permanent --direct --add-rule ipv4 filter OUTPUT 0 -d 103.206.122.245/32 -j DROP
firewall-cmd --permanent --direct --add-rule ipv4 filter INPUT 0 -d 103.206.123.13/32 -j DROP
firewall-cmd --permanent --direct --add-rule ipv4 filter INPUT 0 -d 103.206.122.245/32 -j DROP
Close unused ports
Close ports on all incoming and outgoing traffic not needed by your server to function.
Monitor system behavior
Monitor server integrity and changes happening on it.
Strengthen password policy
Use a complicated password policy for all users, or allow only SSH key authentication options.
Conclusion
Usually, the creators of Linux malware don’t try so hard to evade detection. But that’s not always the case, as I have shown with HiddenWasp. For such complicated malware, purely manual protection measures are risky at best, ineffective at worst. If you have security issues on your infrastructure, the quickest way to solve them is with a mature and automated security package, such as our Imunify360 Security Suite.


.png?width=115&height=115&name=pci-dss%20(1).png "pci-dss")